Give Your Sprinkler a Spring Tune-Up
Sprinkler System Start-Up Tips
The warmth of spring means it’s time to prepare your landscape sprinkler system for another season of watering.
Hiring a qualified irrigation professional to perform tasks like spring start-up is always best, but experienced do-it-yourselfers, can follow these tips:
Timing Is Everything
First of all, you need to make sure spring has indeed sprung. The soil beneath your landscaping is always the last to thaw, so use a shovel to confirm that the ground is frost-free 12 inches down. Starting your sprinkler system while the ground is still frozen can result in damaged pipes. Is the ground still hard as a rock? Wait another week and try again.
Then check the settings on your sprinkler to make sure they’re appropriate for your landscape’s watering needs. Replace the back-up battery in the timer/controller, if necessary.
Go with the Flow
Before turning on any water to the system, double-check that all manual drain valves are returned to the “closed” position. When you first turn the water back on, be sure to open the system main water valve SLOWLY to allow pipes to fill with water gradually. Opening the water valve to quickly can result in a high-pressure surge called “water hammer,” which often causes burst pipes and damaged valves.
Check for rocks, dirt, sand and other types of debris that could block your sprinkler heads. And keep an eye out for spray heads that may have become buried with debris over the course of the winter.
Nozzles and sprinkler heads are designed to withstand normal wear and tear of irrigation, but not errant lawn mowers or snowplows. So be sure to replace all cracked, chipped or worn components. A broken or leaky sprinkler can wreak havoc on both your landscaping and water bills.
Valves and Pressure Gauges
 The valves in your irrigation system are the system’s heart. It’s important to visually inspect each valve to determine that it’s operating properly. You can do this by manually activating all zones from the controller.
Also, make sure the water pressure is at a safe operating range. Too much pressure will result in cracked pipes, busted valves, sprinkler head leaks and inefficient watering.
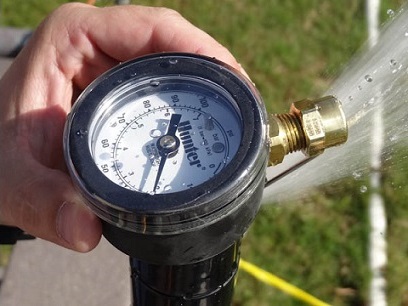
A water pressure gauge is often helpful. These devices typically connect to a hose faucet and give you a good idea of the pressure in your irrigation system. (Suggested operating range is typically 40 -65 PSI.) Hint: If water is “misting” out of your sprinkler heads, your pressure is too high and should be reduced.
Think It’ll Rain?
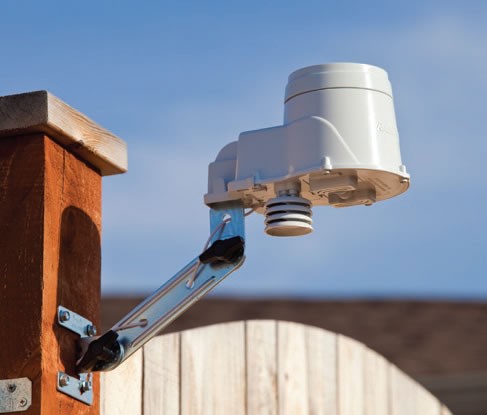
Most modern irrigation systems are equipped with a rain sensor. This device should also be checked prior to activating your system in the spring. Here’s how:
 First, consult the systems operator’s manual to determine the proper setting for testing your unit. (For example, some systems must be set to the “manual all stations” setting to test them. If that is the case with your system, you cannot test it on the “manual single station” setting.)
- After properly setting the irrigation system control, check the system to make sure it came on. (You may need a helper to assist you.)
- Once you have confirmed that the sprinkler is running, depress the plunger located on the top of the rain sensor. The sprinkler system should stop irrigating within a few seconds.
- If watering does not stop when you depress the plunger, you’ll have to troubleshoot the system. Confirm that all wiring connections on the sensor and on the sprinkler control unit are tight. Check to make certain that the jumper tab, also called a jumper wire, was removed when the rain sensor was hooked up to the control panel.
Also be aware that the disk inside a rain sensor can become clogged with dirt or insects, which can keep it from functioning properly. Consult your operator’s manual for the correct procedure to clean the disk.
A Word about Backflow
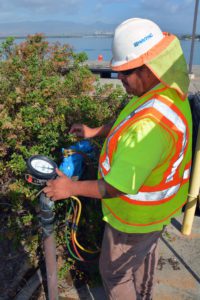 A backflow device has been installed on your irrigation system in accordance with Ohio state law. This device prevents a cross-connection from occurring between the drinkable and undrinkable water in your home.
Spring is a good time to have your backflow preventer tested, as annual testing of the device is required in the state of Ohio. This testing can only be done by individuals who have been certified by an approved testing school. Backflow testers must have at least 24 hours of training in the classroom and hands-on test lab.
To locate a certified backflow tester in your area, Click Here.
Leave It to the Pros
Again, it’s best to leave all spring start-up tasks to the professionals. A qualified service technician will go through your irrigation system zone by zone and check every irrigation spray pattern for optimum turf and plant coverage, as well as check each sprinkler head and valve for any leaks. He can also test and clean your rain or weather sensor to ensure top performance.
Lastly, the technician will program the controller for the proper irrigation schedule, based on your landscape and weather conditions, as well as neighborhood watering restrictions.
Sources:
Hunter Industries
Rainbird
SF Gate

 First, consult the systems operator’s manual to determine the proper setting for testing your unit. (For example, some systems must be set to the “manual all stations” setting to test them. If that is the case with your system, you cannot test it on the “manual single station” setting.)
