Choosing the Right Sprinkler Head: Sprays vs. Rotors
The Right Sprinkler Head for the Job
Ever since the 1970s, irrigation experts have been debating the merits of the rotor sprinkler head vs. the spray head.
Of course, each job site presents its own challenges and requirements. But there are some general situations that make either spray heads or rotor heads the best choice.
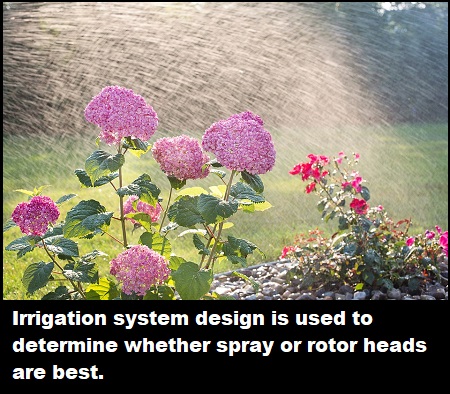
Pixabay Image
According to Pete Diebolt, president of Diebolt Landscape in Mohnton, Pennsylvania, the type of head selected is dictated by the irrigation system design. “The heads are going to have all different lengths of throw and uniformity coefficient. The distribution pattern, wind, slope and other design factors would have a bearing on the size nozzle and how to program the zones to run,” Diebolt said.
The system design already takes into consideration a host of environmental factors: wind or shade, elevation changes, the square footage of the area to be watered, etc. After that, choosing between a spray head and a rotor head comes down to a few other factors.
Let’s explore the advantages and disadvantages of each.
Spray Heads
More properly called “fixed spray heads” these heads are smaller and spray a fan-shaped pattern of water. Nozzles are typically interchangeable and determine the pattern and radius of the water throw (e.g., half circle, full circle, etc.) Specialty patterns are also available for long, narrow areas.
–Article Continues Below–

Hindsite Software Infographic
Spray heads are usually spaced up to 18 feet apart. Water pressure must be between 20 and 30 PSI of for these heads to operate properly. Note: most spray heads start to create lots of mist at pressures above 45 PSI, resulting in poor sprinkler performance.
Spray Head Advantages
Designed for smaller areas, spray heads will disperse more water in a shorter period of time. So they’re a good choice for areas near patios or other hardscaping that is not intended to get wet.
 While spray heads are less expensive than rotors, their installation requires more pipe, trenches and valves.
Justin Moseley is the irrigation manager for Nelson Landscaping in Edmond, Oklahoma. He believes spray heads definitely have their place.
“For flower beds, we use nothing but pop-up spray heads. If it’s a smaller area, from eight to 20 feet, we’re doing spray heads,” he said.
Spray Head Disadvantages
Spray heads are more prone to clogging then rotors, so they often require more maintenance, Moseley said. “In Oklahoma, we have hard water that causes calcium deposits to build up in the nozzles. About every five years, depending on water quality, you’ll have to replace the internal filter on that nozzle.”
Rotor Heads
Rotor heads utilize changeable nozzles that emit water as a single stream over an adjustable. Best example is the “impact” rotor sprinkler, which makes a distinctive ticking sound. But impact rotors are quickly being replaced by quieter, smaller, gear-driven rotors.
The rotor sprinkler head is much more flexible when it comes to spacing; they can be spaced from eight to 65 feet apart. Bear in mind that traditional rotors spaced more than 20 feet apart require much greater water pressure than spray heads — 45 psi, with an operating range of 25 to 65 psi.
Rotor Head Advantages
Rotor heads are usually the better choice for larger areas of turf. They have a low precipitation rate, so they will evenly cover more area over a longer period of time.

About Rotary Nozzles
While the terms “rotor” and “rotary” are often used interchangeably, they really are two different mechanisms.
“Rotor” is a general term that describes the various types of sprinklers that rotate streams of water back and forth or in circles over the landscape.
Rotor heads emit a single stream of water as they rotate.
“Rotary” heads produce multiple streams of water that rotate around the nozzle, resembling rotating spider legs. Depending on the mode, rotary heads have a general radius between 15 and 35 feet.
Compared to standard rotor heads, rotary heads are very small — the same size as the standard nozzle on a spray-type sprinkler. So they fit onto the smaller spray head pop-up bodies.
But these heads produce much less mist than standard spray heads, making them more efficient, and often promoted by water conservation agencies.
“Rotors are used in applications where large areas of turf need to be irrigated, and greater coverage distance is needed, such as on athletic fields,” said Kelsey Jacquard, product manager at Hunter Industries.
And because they allow more time for water absorption, they’re ideal for slopes. With a larger head than spray-type models, they easily provide more coverage, according to Diebolt. “The coverage might be three or four times the square footage. Labor savings is incredible,” he said.
Rotor Head Disadvantages
Rotors and rotary nozzles require less pipe and trenches, but the rotors themselves are more expensive than spray heads.
In addition, rotors may take longer to install than spray heads because their ultimate positioning is not immediately evident, according to Moseley.
“You have to set them and then recheck them after they’re installed. Whereas with pop-up sprays, once I flush them out, I can set a nozzle and know which way it’s going to spray. Be it a fixed or adjustable nozzle, I can set it where I don’t even have to have water running through it to be set. Rotors need a little more fine-tuning,” he said.
Rotor heads are also spaced further apart, so the material cost can be a little more than that of a spray head, Diebolt added.
Rotor or Rotary?
When determining whether to use a standard rotor or rotary nozzle (see sidebar), Jacquard offered this general rule of thumb: “Distances under 15 feet are best irrigated by rotary nozzles, and distances above 35 feet, by rotors. In between those distances, what type of sprinkler head to use is a matter of preference by the designer or contractor.”
Customer Education
For both rotors and spray heads there are plenty of product options. The challenge can be in educating the customer on their individual benefits.
“The cost difference between them is significant, so it’s important to educate the customer on why you are going with triple the amount for one head versus the other,” Moseley said.
Sources:
Featured Image: Pixabay
Lawn & Landscape
Irrigation Tutorials
Irrigation & Green Industry

 First, consult the systems operator’s manual to determine the proper setting for testing your unit. (For example, some systems must be set to the “manual all stations” setting to test them. If that is the case with your system, you cannot test it on the “manual single station” setting.)