November: Time for Winterizing
The dreary days of November remind us that it’s time to start thinking about winterizing your irrigation system.
Water expands when it freezes. Since automatic irrigation systems are usually buried only about twelve inches below the surface of the soil, water left in an irrigation system in freezing climates over the winter, even a mild winter, will certainly freeze — causing damage to pipes, fittings, valves, and sprinklers. Damage caused by a frozen irrigation system can be expensive and time consuming to repair next spring. Preventing winter damage by properly winterizing the irrigation system is important.
Using compressed air to force water out of the irrigation system is the most common method of winterization. However, irrigation systems equipped with automatic or manual drain valves do not require compressed air to winterize. Only the installing contractor will know if an irrigation system is equipped with automatic or manual drain valves.
Selecting an Air Compressor
Air compressors are available in various sizes. A properly sized air compressor is critical in order do effectively and efficiently blow air into the irrigation system, forcing any water out. The most common portable air compressor (representing about 80% of the portable air compressors in use today) is the 185 portable air compressor. This machine is rated at 185 cfm at 100 psi at full load.
This type of compressor can be found through a contractors’ equipment rental shop, and it’s more than adequate for most residential and commercial irrigation systems. Smaller 5 h.p. electric air compressors, even if they’re 100 psi, do not deliver enough volume of air to adequately winterize an irrigation system.
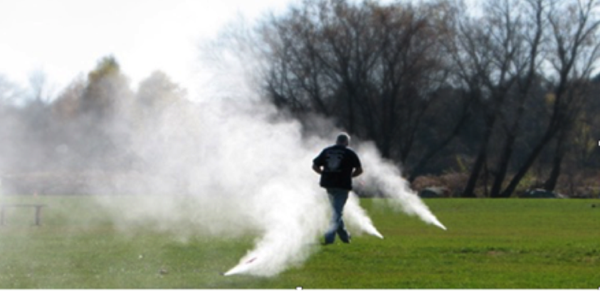
How-To: Compressed Air Winterization
When using a compressor for winterizing your system, follow these steps:
- Shut off the water to the system at the point of connection. The system shut-off valve may be either a ball valve or gate valve. It should be located in the basement or directly behind the water meter.
- Next, open a zone valve to relieve the system pressure.
- Attach the air hose from the air compressor to the blow-out point. The blow-out point is usually located directly behind the backflow device. The blow-out point may be a quick coupling valve, a hose bib, or a boiler drain.
A note of caution: The expanding air coming from the air compressor into the irrigation system will get hot and may melt the plastic pipe. Carefully check the temperature of the air hose connection at the blow-out point. Slow down or stop momentarily if it feels too hot! Cycling through each zone two or three times for short intervals will prevent too much heat buildup.
- Set the pressure regulator on the air compressor at 50 to 80 psi.
- On smaller residential systems, where the zones are typically about 10 gpm or less, open one electric remote control valve manually. Then cycle through all the other zones two to three minutes by manually opening each valve or by electrically operating each valve at the controller. Opening one valve manually will help to keep the air compressor from building up too much pressure, while assuring an adequate volume of air to thoroughly blow out all the water in the system. (On larger systems, it may not be necessary to open one valve manually.)
- Allow the air to flow through each zone until water and water vapor no longer appears from any sprinklers in the zone. Start with the zone with the highest elevation in the system or farthest from the point of connection. Blow out each zone successively toward the point of connection. It’s a good idea to cycle through each zone two times, to ensure no water is remaining.
How-To: Automatic Drain System Winterization
Some systems are equipped with automatic drains that open when the system pressure falls below 10 psi. For these systems, it is usually only necessary to turn off the water.
- Open a drain valve after the point of connection.
- Winterize the backflow device and controller (See “Backflow Preventer Winterization” below.)
Some irrigation systems incorporate automatic drain valves on the laterals with manual drain valves on the main line. The manual drain valves will be located in small valve boxes at the end and at low points on the main line. Open the drain valves, and allow the water to drain out completely. Then close the drain valve.
How-To: Manual Drain System Winterization
If your system is equipped with manual drain valves:
- Locate the drain valve for each zone and the main line. The manual drain is usually located in a small valve box at the end of the zone and at every low point. Also, the main line will have a manual drain at the end of the line and at every low point.
- Open each drain valve, allowing all the water to drain out, and then close the manual drains.
- Winterize the backflow device and controller (See “Backflow Preventer Winterization” below.)
How-To: Backflow Preventer Winterization
The backflow preventer is the plumbing device attached to the outside of your house. It is the source of water to the irrigation system, and it can can freeze and burst in only a few hours of below-freezing temperatures. So winterizing your backflow preventer is critical.
Here’s how:
- Turn off the main shut-off valve to the system.
- Using an adjustable wrench, remove the outlet drain plug or spigot on the outside piping.
- Turn valves to a 45-degree angle (half-open/half-closed position).
- Cover/wrap the backflow valve and all copper pipe with a large towel or blanket.
- Place 2-3 gallon bucket underneath drain and open the drain valve. Generally, 1-2 gallons of water will empty into the bucket. Once all the water has drained out of the pipe, close the drain valve.
How-To: Controller and Rain Sensor Winterization
To prepare the irrigation controller for winter, simply turn the controller to the off or “rain shutdown” position. (You can also disconnect the power and remove the battery, but this is not necessary.) Do not allow the controller to cycle through an irrigation schedule without water in the system.
If your irrigation system is equipped with a rain sensor or a soil moisture sensor, it’s not usually necessary to cover or remove the sensor when winterizing. Check with the manufacturer to make sure your rain sensor does not require any special instructions in preparation for winter.
How-To: Pump Winterization
If you have a submersible pump (i.e., located in a lake, stream or pond), the check valve at the pump must be removed to keep the discharge hose from freezing. The best way is to simply remove the pump and discharge hose from the water each winter, and reinstall in the spring.
If you have a centrifugal pump, follow these steps:
- Remove the drain valve (located at the base of the pump housing) and store it for the winter.
- Disconnect the power supply, to prevent the pump from being accidentally turned on without any water. (A pump running without water will quickly burn up.)
- If the pump is drawing water from a lake or stream, you must remove the intake hose or suction line completely from the water and store it for the winter.
- If a check valve is located on the discharge side of the pump, it too must be removed and stored for the winter.
Leave It to the Pros
As you can see, winterizing an irrigation system can be a complicated process. A knowledgeable professional is essential to minimize damage caused by freezing. An improperly winterized irrigation system can be an expensive proposition next spring.