by Tom Barrett | Jul 11, 2018
How to Keep Landscapes Healthy
in Midsummer
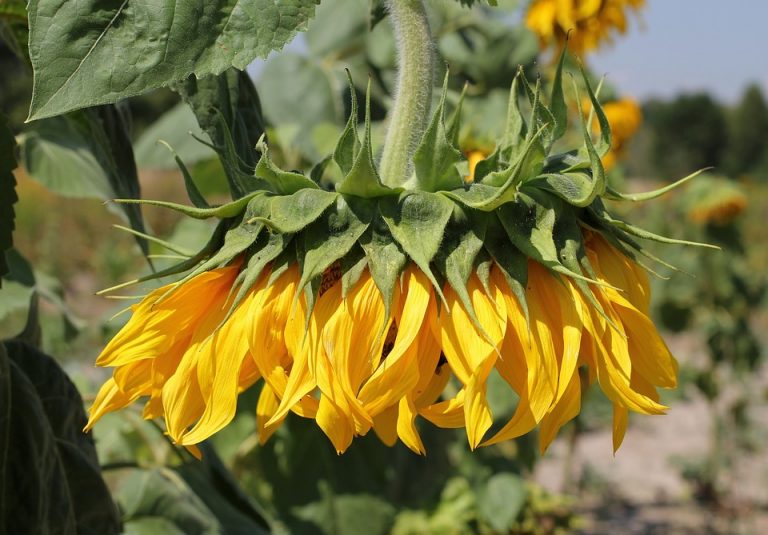
July in Ohio is hot.
Along with that intense summer heat comes the prospect of drought. Which means we may have to make some agonizing decisions regarding which plants in our yards and gardens to save and which plants to let go. For some of us, that can be like having to make a “Sophie’s Choice.”
So before the need for these difficult decisions becomes a reality, there are some things we can do to make the most of the water that will be available.
The Importance of Mulch
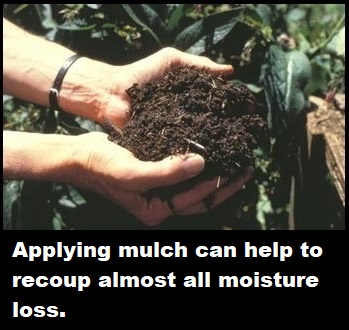
Did you know that more than 50 percent of the water applied to bare soil is lost through evaporation? Of course, the rate of that evaporation increases with higher air temperatures, solar radiation and wind. But applying mulch in landscape and garden beds can help to recoup almost all of that moisture loss, depending on the type of mulch used. (Added bonus: Mulch helps keep the plant roots cool.)
 For landscape plants and perennial flower beds, for instance, gardening experts recommend applying shredded bark or wood-chip mulches on top of bare soil at a depth of 3-4 inches. Surprisingly, however, these same wood-chip mulches should not be used in vegetable gardens and annual flower beds. Why? Because when decomposing, they cause soil microbes to deplete the soil’s nitrogen reserves. This makes the much-needed nitrogen unavailable for use by the garden plants.
Organic Composts
With vegetable gardens and annual beds (or wherever the soil is regularly tilled or disturbed), organic mulches that break down more quickly are advisable. These would include well-rotted compost, animal manure, lawn/yard clippings and any combination of these.
To increase the effectiveness of grass or compost mulches, try this:
- Place one to two moistened sheets of newspaper on top of the soil, slightly overlapping the sheets
- Cover the newspaper with a layer of compost mulch.
- Allow the newspaper to decay over the growing season.
- Till the decayed paper into the soil, along with the top layer of mulch.
What About Rocks?
Rock mulches should generally be avoided around landscape plants. During the day, the rocks will absorb heat and then radiate that heat back at nighttime. This increases both the heat stress and water needs of plants. In particular, white and other light-colored rock reflects light back onto plants, compounding the heat stress felt by plants during times of drought.
More Drought-Related Tips
Here are a few more guidelines to keep in mind when navigating through a seasonal drought:
- Do not fertilize. All fertilizers contain salts that will rob the plants of much-need moisture in the soil. Wait until your plants have fully recovered from the effects of drought before fertilizing. (Plants experiencing drought conditions often appear wilted and droopy because they’re saving their energy.)
- Do not prune during or immediately following a drought. To do so would place too much stress on the plants. and send them into shock.
- Apply water slowly and deeply to the soil. The best way to maintain your garden is through drip irrigation or soaker hoses that apply water directly to the soil above the root zone. Placing these hoses under two to three inches of mulch helps retain soil moisture.
- Hold off on watering until after sundown to reduce evaporative water losses.
Sources:
Washington State Univ. Extension
Today’s Homeowner
Avon Lake Regional Water
by Tom Barrett | Apr 11, 2018
Irrigation Audits Becoming
Mandatory in Some Areas
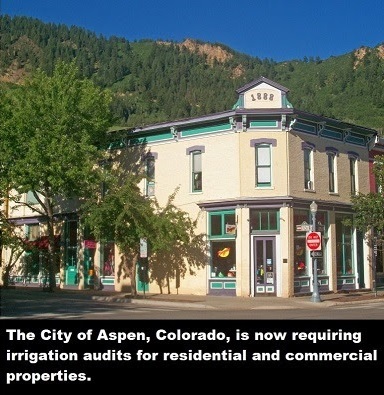
Water’s continued scarcity is making irrigation audits more important than ever.
For example, the city of Aspen, Col., now requires that such audits be completed whenever a new landscaping system has been installed. And the audit must be performed by a third-party certified landscape irrigation auditor.
There’s only one problem: Such certified auditors are as rare as hens’ teeth in that area of Colorado.
A Host of New Regulations
The irrigation audits are part of a package of new regulations for the city, which also require that all new or substantially remodeled residential projects include a landscape plan, an irrigation plan and a water budget for the site.
In order to address the lack of certified auditors in the area, Aspen city officials hope to establish a local training program.
The city’s new water-budget goal for landscaping is to use no more than 7.5 gallons per square foot per season. So far, 17 properties have been landscaped and irrigated using the new regulations. Those projects averaged 7.2 gallons per square foot, according to a parks and utilities representative.
Aspen’s new landscaping regulations apply only to residential and commercial properties. They do not apply to “irrigation of public parks, sports fields, golf courses and schools.”
Increased Need for Auditors
Of course, the need for certified irrigation auditors is greatest in areas with water scarcity issues, like the Southwest. But water conservation and water efficiency are two separate goals. Even areas that typically receive adequate precipitation (like Ohio) could always benefit from increased water efficiency.
As the pursuit of improved water efficiency becomes increasingly popular (and important), the need for certified irrigation auditors will most likely increase, too. Irrigation auditing entails three steps:
- Collecting data
- Verifying that irrigation systems are working as designed, and
- Identifying opportunities to improve water efficiency.
An effective auditor will:
- Analyze water requirements and irrigation use within the context of each site’s unique conditions.
- Develop irrigation schedules based on water requirements, quality and availability.
- Make maintenance recommendations to keep the irrigation system working reliably and cost effectively.
- Estimate potential dollar and water savings from implementing innovative irrigation technologies, products and practices.
Where to Start?
To become a Certified Landscape Irrigation Auditor (CLIA) under the Irrigation Association’s program, a landscape contractor must:
- Have at least one year of professional experience
- Submit a completed water audit which includes one rotor and one spray area for evaluation (verified by an IA-certified professional in good standing).
According to Brent Mecham, the IA’s industry development leader, the CLIA program “shows that you have the expertise needed and that you’re better qualified to evaluate irrigation systems.”
If you’re interested in adding irrigation audits to your menu of landscaping services, click here to start the process.
Sources:
Aspen Times
Irrigation & Green Industry
Irrigation Association
by Tom Barrett | Apr 4, 2018
CIT Trainees Learn Basics,
Prepare for Exam
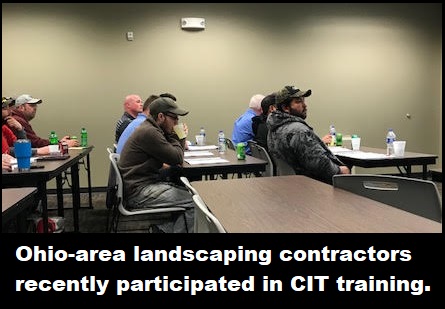
Last month, 18 Ohio-area landscaping contractors participated in Certified Irrigation Technician (CIT) training at two separate sites. These Irrigation Association training sessions were sponsored by Wolf Creek Company and Rain Bird.
During the training, contractors learned the basics of hydraulics and irrigation system installation and maintenance. In addition to an overview of irrigation system components and how they operate, attendees learned how to:
- Glue and repair PVC pipe
- Install nozzles and adjust sprinkler heads
- Set and repair electric valves
- Utilize various field and controller wiring techniques.
Trainees also prepared for the CIT exam, a prerequisite to receiving certification.
CIT Overview
A CIT is an entry-level irrigation field professional, and it is the newest certification offered by the Irrigation Association. CITs install, maintain and repair irrigation systems. Their responsibilities include:
- Cutting and joining pipe, with an understanding of basic hydraulics, as well as the limitations of different piping systems.
- Laying out and installing pipes and water delivery components; backflow prevention components; mechanical, hydraulic and electrical irrigation controls; and other irrigation system components.
- Troubleshooting and repairing all irrigation components and systems.
Becoming a CIT
Certification gives you a competitive edge. By becoming a CIT, you can:
- Add instant credibility with customers and employers.
- Increase job opportunities.
- Demonstrate your commitment to efficient water management.
- Qualify for the EPA WaterSense program.
Interested? Here’s what you have to do:
- Pass the irrigation technician exam. The three-hour exam includes 100 equally weighted, multiple-choice questions on basic irrigation principles, basic electrical principles and basic hydraulics.
CIT Exam Fees
- Irrigation Technician Exam Fee — $175 (Member), $300 (Nonmember)
- Exam Retake Fee — $175 (Member), $300 (Nonmember)
- Annual Renewal Fee (one certification) — $50 (Member), $100 (Nonmember)
- Annual Renewal Fee (two or more certifications) — $100 (Member), $150 (Nonmember)
by Tom Barrett | Mar 1, 2018
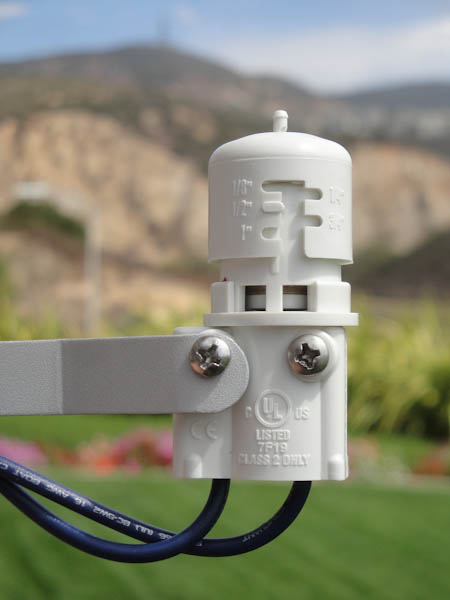
Sprinkler System Start-Up Tips
The warmth of spring means it’s time to prepare your landscape sprinkler system for another season of watering.
Hiring a qualified irrigation professional to perform tasks like spring start-up is always best, but experienced do-it-yourselfers, can follow these tips:
Timing Is Everything
First of all, you need to make sure spring has indeed sprung. The soil beneath your landscaping is always the last to thaw, so use a shovel to confirm that the ground is frost-free 12 inches down. Starting your sprinkler system while the ground is still frozen can result in damaged pipes. Is the ground still hard as a rock? Wait another week and try again.
Then check the settings on your sprinkler to make sure they’re appropriate for your landscape’s watering needs. Replace the back-up battery in the timer/controller, if necessary.
Go with the Flow
Before turning on any water to the system, double-check that all manual drain valves are returned to the “closed” position. When you first turn the water back on, be sure to open the system main water valve SLOWLY to allow pipes to fill with water gradually. Opening the water valve to quickly can result in a high-pressure surge called “water hammer,” which often causes burst pipes and damaged valves.
Check for rocks, dirt, sand and other types of debris that could block your sprinkler heads. And keep an eye out for spray heads that may have become buried with debris over the course of the winter.
Nozzles and sprinkler heads are designed to withstand normal wear and tear of irrigation, but not errant lawn mowers or snowplows. So be sure to replace all cracked, chipped or worn components. A broken or leaky sprinkler can wreak havoc on both your landscaping and water bills.
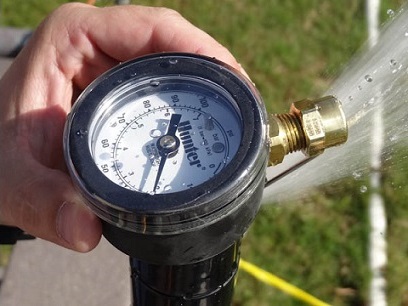
Valves and Pressure Gauges
The valves in your irrigation system are the system’s heart. It’s important to visually inspect each valve to determine that it’s operating properly. You can do this by manually activating all zones from the controller.
Also, make sure the water pressure is at a safe operating range. Too much pressure will result in cracked pipes, busted valves, sprinkler head leaks and inefficient watering.
A water pressure gauge is often helpful. These devices typically connect to a hose faucet and give you a good idea of the pressure in your irrigation system. (Suggested operating range is typically 40 -65 PSI.) Hint: If water is “misting” out of your sprinkler heads, your pressure is too high and should be reduced.
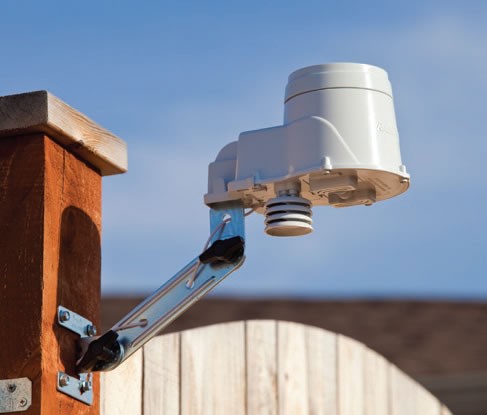
Think It’ll Rain?
Most modern irrigation systems are equipped with a rain sensor. This device should also be checked prior to activating your system in the spring. Here’s how:
- First, consult the systems operator’s manual to determine the proper setting for testing your unit. (For example, some systems must be set to the “manual all stations” setting to test them. If that is the case with your system, you cannot test it on the “manual single station” setting.)
- After properly setting the irrigation system control, check the system to make sure it came on. (You may need a helper to assist you.)
- Once you have confirmed that the sprinkler is running, depress the plunger located on the top of the rain sensor. The sprinkler system should stop irrigating within a few seconds.
- If watering does not stop when you depress the plunger, you’ll have to troubleshoot the system. Confirm that all wiring connections on the sensor and on the sprinkler control unit are tight. Check to make certain that the jumper tab, also called a jumper wire, was removed when the rain sensor was hooked up to the control panel.
Also be aware that the disk inside a rain sensor can become clogged with dirt or insects, which can keep it from functioning properly. Consult your operator’s manual for the correct procedure to clean the disk.
A Word about Backflow
A backflow device has been installed on your irrigation system in accordance with Ohio state law. This device prevents a cross-connection from occurring between the drinkable and undrinkable water in your home.
Spring is a good time to have your backflow preventer tested, as annual testing of the device is required in the state of Ohio. This testing can only be done by individuals who have been certified by an approved testing school. Backflow testers must have at least 24 hours of training in the classroom and hands-on test lab.
To locate a certified backflow tester in your area, Click Here.
Leave It to the Pros
Again, it’s best to leave all spring start-up tasks to the professionals. A qualified service technician will go through your irrigation system zone by zone and check every irrigation spray pattern for optimum turf and plant coverage, as well as check each sprinkler head and valve for any leaks. He can also test and clean your rain or weather sensor to ensure top performance.
Lastly, the technician will program the controller for the proper irrigation schedule, based on your landscape and weather conditions, as well as neighborhood watering restrictions.
Sources:
Hunter Industries
Rainbird
SF Gate
by Tom Barrett | Nov 8, 2017
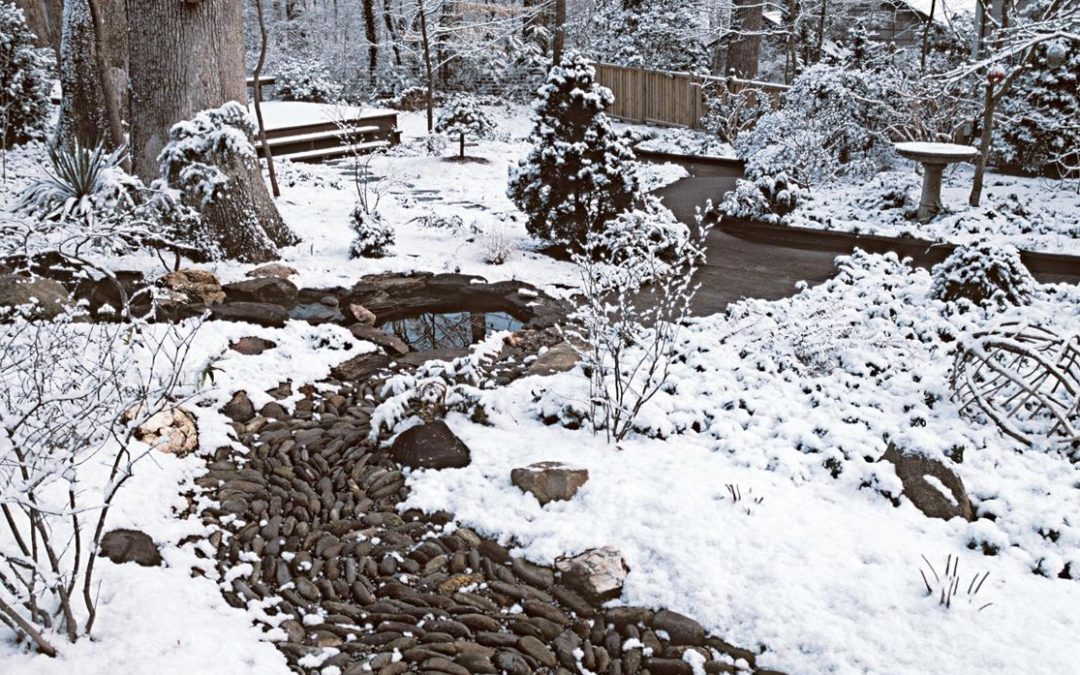
November Means It’s Time to Winterize
(Note: Portions of this article originally appeared in SportsTurf Magazine)
The dreary days of November remind us that it’s time to start thinking about preparing your irrigation systems for winter.
Here are some tips for winterizing an irrigation system:
Preventing Pipe Damage
Of course, water expands when it freezes. Since automatic irrigation systems are usually buried only about twelve inches below the surface of the soil, any water left in the system over the winter (even a mild winter) will certainly freeze. This causes damage to pipes, fittings, valves, and sprinklers. And this damage can be expensive and time-consuming to repair next spring. So, preventing winter damage by properly winterizing the irrigation system is important.
The following video clip demonstrates the consequences of failing to do so:
The most common method of winterization is to use compressed air to force water out of the irrigation system. However, some irrigation systems are equipped with automatic or manual drain valves. These do not require compressed air to winterize. Check with your installing contractor to determine if your irrigation system has automatic or manual drain valves. If you’re not sure, then go ahead and use compressed air. Using compressed air on an irrigation system equipped with automatic or manual drain valves will not harm the system components, and will ensure the irrigation system is properly winterized.
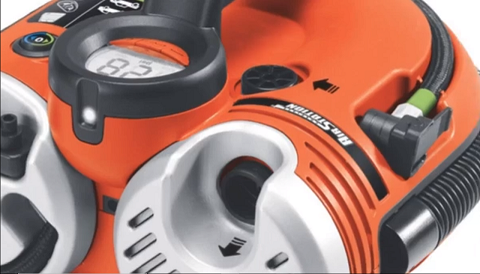
Selecting an Air Compressor
Air compressors are available in various sizes. A properly sized air compressor is critical in order do effectively and efficiently blow air into the irrigation system, forcing any water out. The most common portable air compressor (representing about 80% of the portable air compressors in use today) is the 185 portable air compressor. This machine is rated at 185 cfm at 100 psi at full load.
This type of compressor can be found through a contractors’ equipment rental shop, and it’s more than adequate for most residential and commercial irrigation systems. Smaller 5 h.p. electric air compressors, even if they’re 100 psi, do not deliver enough volume of air to adequately winterize an irrigation system.
How-To: Compressed Air Winterization
When using a compressor to winterize your system, follow these steps:
- Shut off the water to the system at the point of connection. The system shut-off valve may be either a ball valve or gate valve. It should be located in the basement or directly behind the water meter.
- Next, open a zone valve to relieve the system pressure.
- Attach the air hose from the air compressor to the blow-out point. The blow-out point is usually located directly behind the backflow device. The blow-out point may be a quick coupling valve, a hose bib, or a boiler drain.
A Note of Caution: The expanding air coming from the air compressor into the irrigation system will get hot and may melt the plastic pipe. Carefully check the temperature of the air hose connection at the blow-out point. Slow down or stop momentarily if it feels too hot! Cycling through each zone two or three times for short intervals will prevent too much heat buildup.
- Set the pressure regulator on the air compressor at 50 to 80 psi.
- On smaller residential systems, where the zones are typically about 10 gpm or less, open one electric remote control valve manually. Then cycle through all the other zones two to three minutes by manually opening each valve or by electrically operating each valve at the controller. Opening one valve manually will help to keep the air compressor from building up too much pressure, while assuring an adequate volume of air to thoroughly blow out all the water in the system. (On larger systems, it may not be necessary to open one valve manually.)
- Allow the air to flow through each zone until water and water vapor no longer appears from any sprinklers in the zone. Start with the zone with the highest elevation in the system or farthest from the point of connection. Blow out each zone successively toward the point of connection. It’s a good idea to cycle through each zone two times, to ensure no water is remaining.
How-To: Automatic Drain System Winterization
Some systems are equipped with automatic drains that open when the system pressure falls below 10 psi. For these systems, it is usually only necessary to turn off the water.
- Open a drain valve after the point of connection.
- Winterize the backflow device and controller (See “Backflow Preventer Winterization” below.)
Some irrigation systems incorporate automatic drain valves on the laterals with manual drain valves on the main line. The manual drain valves will be located in small valve boxes at the end and at low points on the main line. Open the drain valves, and allow the water to drain out completely. Then close the drain valve.
How-To: Manual Drain System Winterization
If your system is equipped with manual drain valves:
- Locate the drain valve for each zone and the main line. The manual drain is usually located in a small valve box at the end of the zone and at every low point. Also, the main line will have a manual drain at the end of the line and at every low point.
- Open each drain valve, allowing all the water to drain out, and then close the manual drains.
- Winterize the backflow device and controller.
How-To: Winterize the Backflow Preventer
The backflow preventer is the plumbing device attached to the outside of your house. It is the source of water to the irrigation system, and it can freeze and burst in only a few hours of below-freezing temperatures. So winterizing your backflow preventer is critical.
Here’s how:
- Turn off the main shut-off valve to the system.
- Using an adjustable wrench, remove the outlet drain plug or spigot on the outside piping.
- Turn valves to a 45-degree angle (half-open/half-closed position).
- Cover/wrap the backflow valve and all copper pipe with a large towel or blanket.
- Place 2-3 gallon bucket underneath drain and open the drain valve. Generally, 1-2 gallons of water will empty into the bucket. Once all the water has drained out of the pipe, close the drain valve.
How-To: Winterize the Controller and Rain Sensor
To winterize the irrigation controller, simply turn the controller to the off or “rain shutdown” position. (You can also disconnect the power and remove the battery, but this is not necessary.) Do not allow the controller to cycle through an irrigation schedule without water in the system.
If your irrigation system is equipped with a rain sensor or a soil moisture sensor, it’s not usually necessary to cover or remove the sensor for the winter. Check with the manufacturer to make sure your rain sensor does not require any special instructions for winterization.
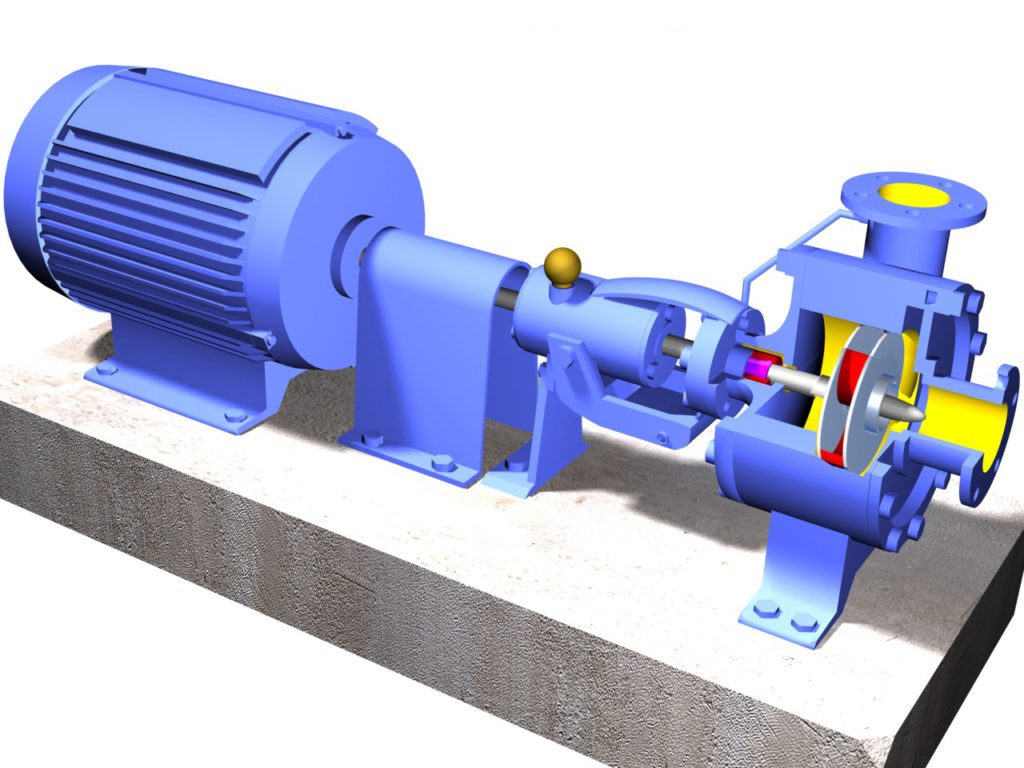
How-To: Winterize the Pump
If you have a submersible pump (i.e., located in a lake, stream or pond), the check valve at the pump must be removed to keep the discharge hose from freezing. The best way is to simply remove the pump and discharge hose from the water each winter, and reinstall in the spring.
If you have a centrifugal pump, follow these steps:
- Remove the drain valve (located at the base of the pump housing) and store it for the winter.
- Disconnect the power supply, to prevent the pump from being accidentally turned on without any water. (A pump running without water will quickly burn up.)
- If the pump is drawing water from a lake or stream, you must remove the intake hose or suction line completely from the water and store it for the winter.
- If a check valve is located on the discharge side of the pump, it too must be removed and stored for the winter.
Leave It to the Pros
As you can see, preparing an irrigation system for winter can be a complicated process. A knowledgeable professional is essential to minimize damage caused by freezing. An improperly winterized irrigation system can be an expensive proposition next spring.
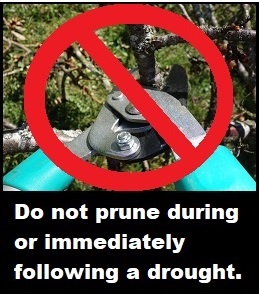 Do not prune during or immediately following a drought. To do so would place too much stress on the plants. and send them into shock.
 In order to address the lack of certified auditors in the area, Aspen city officials hope to establish a local training program.
 Have at least one year of professional experience


 First, consult the systems operator’s manual to determine the proper setting for testing your unit. (For example, some systems must be set to the “manual all stations” setting to test them. If that is the case with your system, you cannot test it on the “manual single station” setting.)
 Here’s how: