by Tom Barrett | Oct 4, 2017
Irrigation Show 2017 Is Set for November 8-9,
Education Conference for November 6-10
Irrigation Show 2017 is the only national trade show designed specifically for irrigation professionals. It’s where the irrigation industry comes together to network, learn and promote irrigation.
Nearly 5,000 distributors, dealers, contractors, consultants and growers are expected to attend this year’s event. You’ll have the opportunity to:
- Check out innovative products, technologies and services.
- Explore new suppliers.
- Learn about the latest business trends and irrigation best practices.
- Network with current business partners and with industry leaders who share the Ohio Irrigation Association’s commitment to efficient irrigation.
Educational Opportunities
While enjoying sunny Orlando, be sure to attend some of the many irrigation seminars and classes that are offered. You’ll learn concepts and practical skills you can implement immediately.
Scheduled classes offer:
- Real-world applications and irrigation case studies.
- Current techniques, field-tested information and best practices.
- Instructors with industry expertise and proven teaching experience.

One-hour seminars will provide detailed coverage on a focused topic in landscape irrigation. Seminars are open to all attendees with a full registration. Participants will earn 1.00 CEU for each hour. This year’s topics will include:
- Irrigating Green Roofs
- Pressure Regulation to Improve Irrigation Efficiency
- Basis of Design
- Top 5 Employment Law Issues Facing Contractors
A Proven Winner
Attendance at last year’s Irrigation Show was up double digits. Exhibitor presence was strong, and new product introductions were plenty.
In fact, research of past shows has indicated a strong correlation between show attendance and future sales. Specifically, within 12 months of the show:
- 77% of the attendees purchased a product or service as a result of contacts made at the show.
- 90% of the attendees contacted exhibitors met at the show.
- 90% of the attendees visited exhibitor websites based on information from the show.
Check out this promotional video from last year’s Irrigation Show:
Sources:
Irrigation Association
Green Industry Pros

by Tom Barrett | Sep 13, 2017
EPA’s WaterSense Sparks Transformation
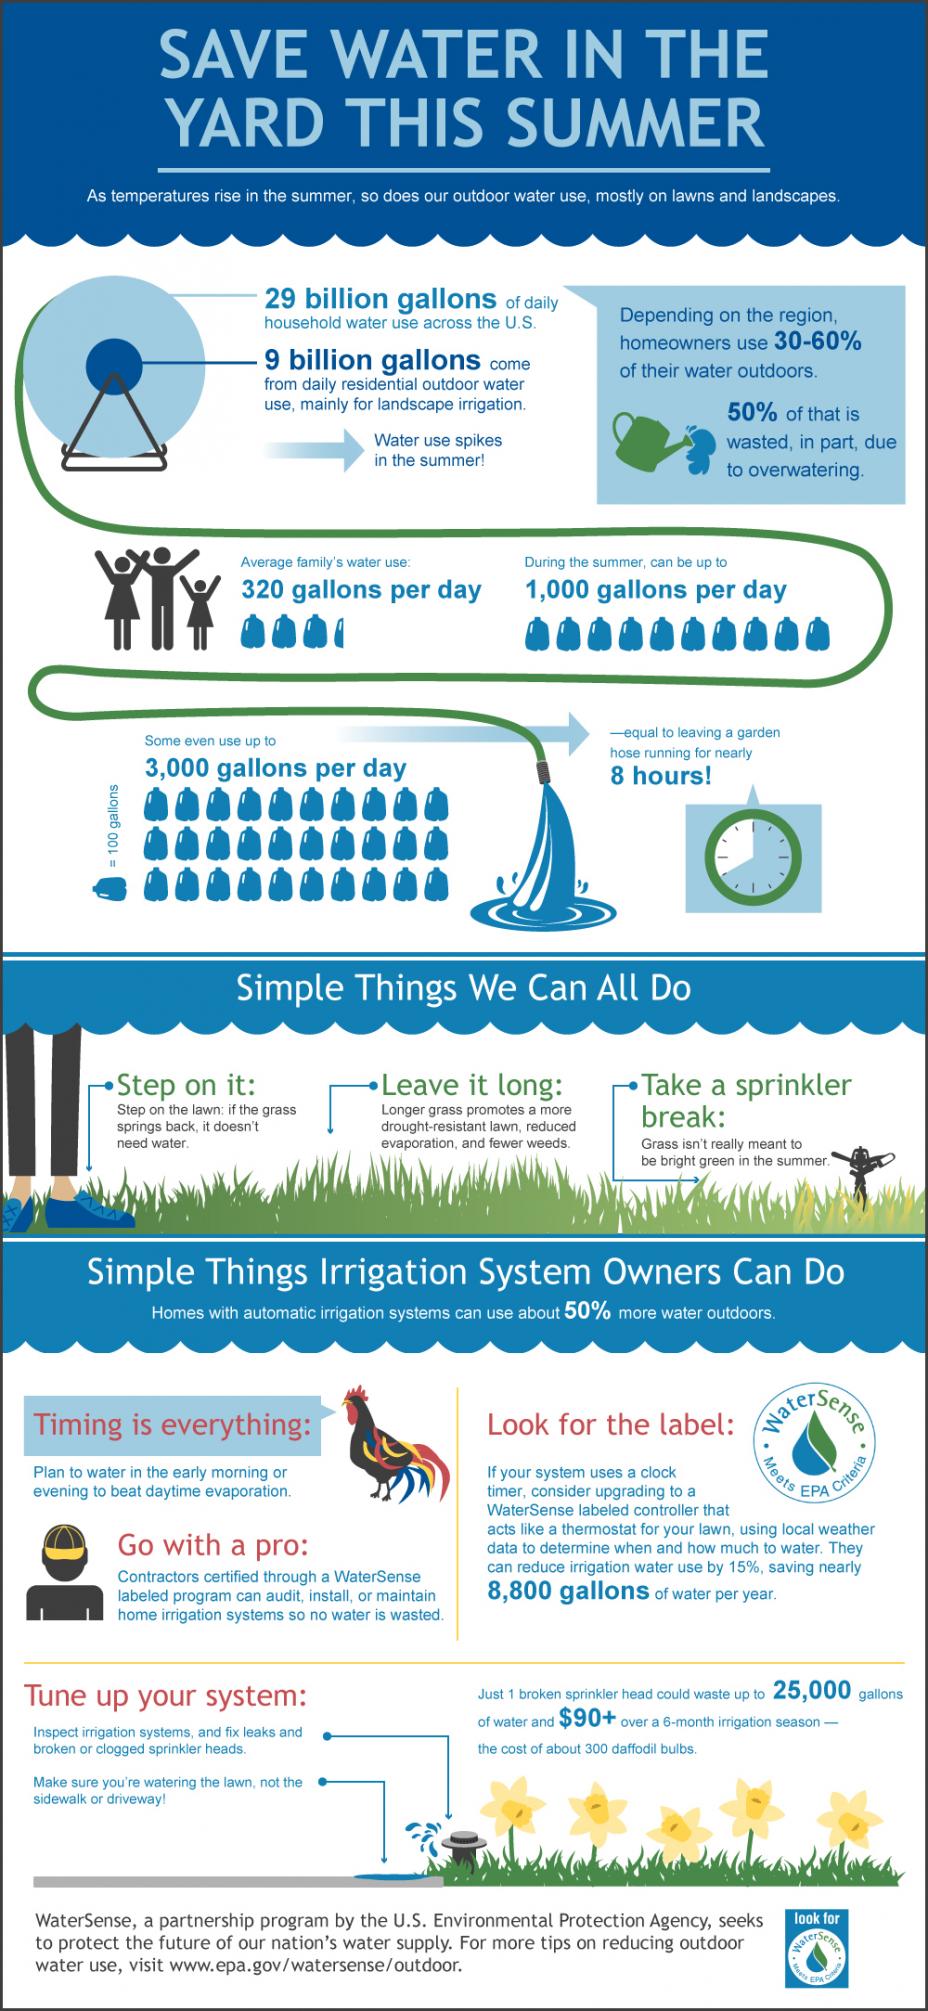
Over the past decade, EPA’s WaterSense program has sparked a market transformation. All across North America irrigation products now save water, energy, and money.
The program was recently threatened by Trump administration budget cuts. But that threat is on hold for now. Let’s take a look at some of the program’s accomplishments in the last 10 years…
Labels and Certification
Since 2007, more than 21,000 product models of plumbing fixtures and irrigation controllers have earned the WaterSense label for efficiency and performance. More than 5,000 new models earned the label in 2016 alone. Nearly 68 million individual labeled products have been shipped to date.

Beginning in 2006, WaterSense certification programs have focused on water efficiency. Such as techniques and technologies for certified irrigation system designers, auditors, and installation and maintenance professionals. Since then, thousands of irrigation specialists have been certified and gained an edge in the competitive marketplace.
The Three “P’s” — Products, Practices, People
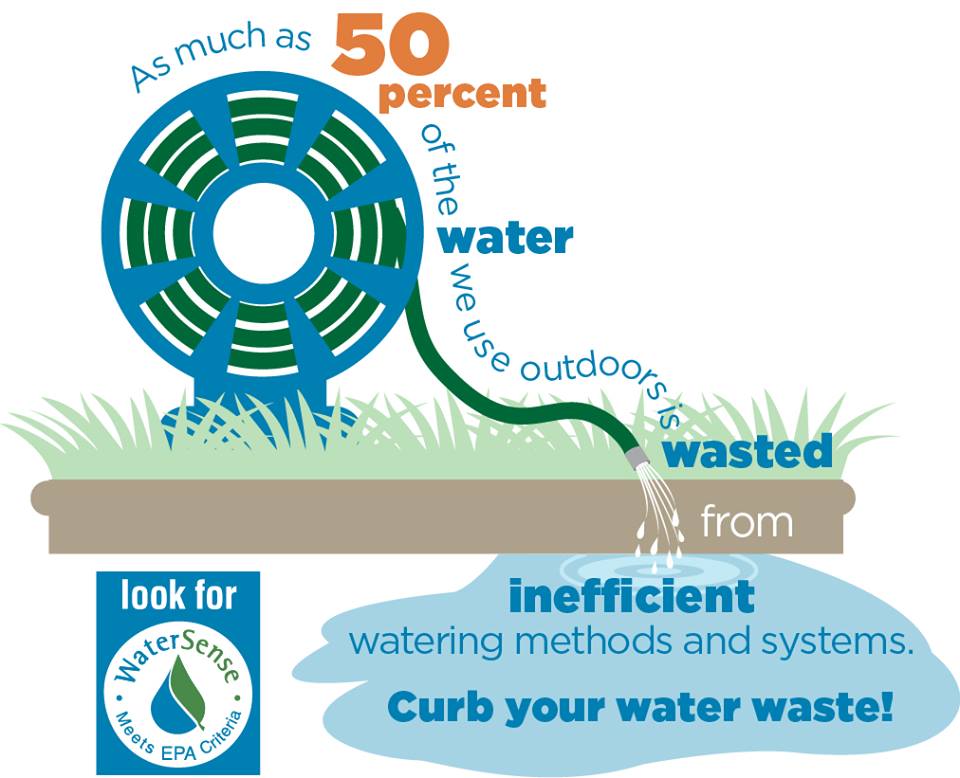
In an effort to reduce the waste of outdoor water, the EPA program has promoted the three “P’s”— products, practices, and people. This includes:
- Designing water-smart landscapes that are well-suited for the local climate
- Installing WaterSense-labeled irrigation controllers, and
- Hiring WaterSense-certified irrigation professionals.
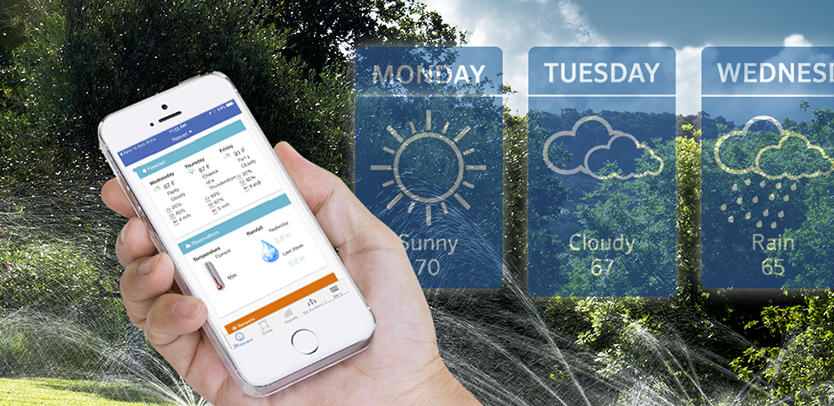
Their efforts have paid off. For instance, in 2016, the number of labeled irrigation controllers increased by an impressive 63% over the previous year. These new, web-based models allow users to adjust their irrigation systems via an app on their smartphone.
What’s Next?
For now, the WaterSense program is focused on product labeling for pressure-regulating sprinkler bodies. The idea is that large amounts of water can be wasted whenever spray sprinklers operate under above-normal pressure. And significant water savings can be realized by regulating this pressure. To this end, the program recently released a draft specification for these new pressure-regulating sprinklers.
Let’s Keep It Going
The Alliance for Water Efficiency (AWE) is working to ensure that the WaterSense program can continue unabated. But they need help. Which is why they’re seeking signers of letters supporting their proposed legislation to keep it going.
Sources:
Environmental Protection Agency
Alliance for Water Efficiency
Interior Appropriations Subcommittee

by Tom Barrett | Aug 9, 2017
Incorporating Wi-Fi Technology into Your Irrigation Business
Are you still in the dark about how to best incorporate Wi-Fi-based irrigation technology into your business?
The national Irrigation Association recently aired a webinar focused on the growing popularity of this technology, as well as the advantages and opportunities it brings to the landscape irrigation market. To purchase the webinar, click here.
Landscape Management magazine recently spoke with webinar presenters Stuart Eyring, president of Hydro-Rain, and Chris Klein, CEO and co-founder of Rachio. Here are some highlights of that interview:
How They Work
Q: How do Wi-Fi irrigation controllers work?
 Chris Klein (CK): A Wi-Fi-based irrigation controller uses the homeowner’s Wi-Fi network to connect to the cloud. That’s where a lot of the process and scheduling takes place, and then that information is sent back down to the controller. You can have access to it through an app on any device you want—a desktop computer, mobile phone, tablet, etc.—and they all communicate with the same computers in the cloud.
Q: Have you seen examples of Wi-Fi controllers being used to upgrade older systems?
CK: Yes, this is happening at a rapid pace. Eighty-five percent of our customers are replacing working controllers, and it’s just as easy as replacing any other controller.
Q: How do you program Wi-Fi controllers?
Stuart Eyring (SE): In terms of programming, the smartphone apps dramatically add to the ease of which programing is done—it’s much better than programming a typical display controller. But there’s a difference in comfort level in terms of where the user base is coming from. There is a transition point to getting people comfortable with this.
Weather Station Access
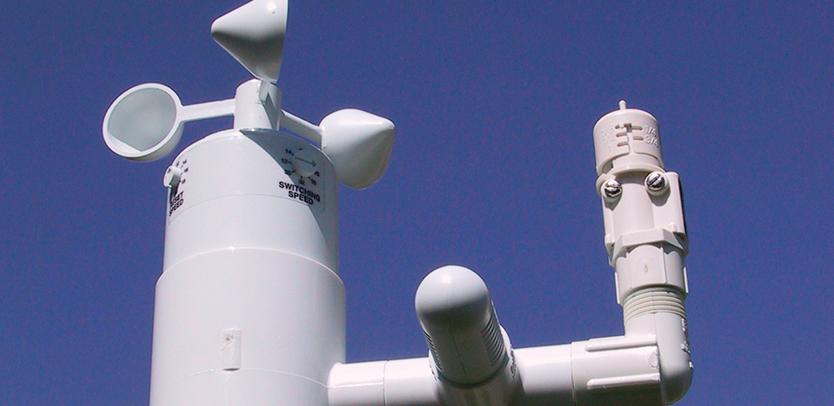
Q: Traditional smart controllers had their own weather instruments on-site, but Wi-Fi-based irrigation controllers now have access to millions of weather stations. How do they get evapotranspiration (ET) information?
CK: We use a variety of weather data providers and run them through equations to get ET. This process is getting more and more sophisticated. The other cool thing is homeowners can choose a weather station, which promotes continued engagement with their irrigation system.
 SE: In our case, we use the National Oceanic and Atmospheric Administration’s National Weather Service database in the U.S. Internationally, we use a database out of Norway. But it actually can be very helpful to have a rain sensor at the location, as well, because it can improve reliability.
Q: So you can add other sensors to a Wi-Fi controller?
SE: Yes, we’ve seen an increase in the use of sensing devices like weather stations and moisture sensors on-site that improve the quality of data.
Connections, Security and Updates
Q: What happens to the controller if it loses the Wi-Fi connection?
SE: The majority of the data is kept in the cloud, but there is a basic operating program that’s stored on the actual controller. While the controller won’t typically make any adjustments based on environmental conditions while in that mode, it will continue to run. When the connection is reestablished, the adjustments will begin again. This is typical across manufacturers.
Q: How do you protect security in terms of Wi-Fi and passwords?
SE: Security definitely can be a concern to a homeowner when they allow someone access to their network. But there is a difference between a contractor connecting to a homeowner’s network and connecting through the cloud. In an ideal case, the homeowner is sharing an access code through an app that would allow their contractor to control the system through the cloud, but not have access to the homeowner’s network.
Q: What happens if I buy my controller today and in 60 days it’s out of date?
CK: Updates to the firmware and the app happen automatically, so customers always have the latest and greatest version. In terms of hardware, who knows what will happen in the future, but as of now, our Generation 1 and 2 products work the same.
SE: In most cases, you won’t even know the firmware has been updated unless you go in and look at it.

Opportunities and Support
Q: What are the business impacts and opportunities that can be enjoyed by contractors venturing into this arena?
CK: There is a great opportunity to impact a contractor’s business by having a number of connected customers. By installing that product and working with them you have a connection with them. You can stay in touch, the homeowner knows where to go for help and it presents an opportunity for customer retention.
Q: What about support? How do you help contractors when they are stuck?
CK: We have a dedicated contractor phone line and can be reached through email and chat, too.
SE: We have noticed that there is really more upfront hand-holding required. But once the Wi-Fi-based irrigation controller is installed and operating, support requirements go down. That’s because of the ease of the interface and how intuitive it is. Getting started can be challenging, but once contractors get the hang of it, it’s really very easy.
Sources:
Landscape Management
Irrigation Association

by Tom Barrett | Apr 5, 2017
Harvest That Precious Rainwater
With April upon us, we are reminded that every year Mother Nature provides us with trillions of gallons of water. Free of charge. In the form of rainwater.
Last year, for instance, the storms which pummeled the Carolinas dropped enough water to halt California’s five-year drought. And yet, few of us take advantage of learning how to capture this precious resource.
Instead, it flows off lawns into streams, then rivers, then oceans.
A recent article in Irrigation & Green Industry magazine suggests that, when irrigation specialists build cisterns to harvest rainwater, they are providing their customers with “manna from heaven.” But they’re also helping to build the water infrastructure of the future. And providing themselves with an additional revenue source.

New Revenue Stream
Paul Lawrence, president of Texas Land & Water Designs LLC, has been installing rainwater harvesting systems for the past seven years, and he’s a huge proponent of the practice. Lawrence feels that, not only is it a good source of revenue, but startup costs are low for the contractor.
“Licensed irrigators already have many of the skills that are required for rainwater harvesting; it’s a real natural fit for them,” he says.
And it’s not as complicated as it might seem. Virtually every house and commercial building already possesses roofing, gutters and downspouts. The catchment system simply takes the rainwater that now flows down the street and stores it for use at a later date.
The Basic Setup
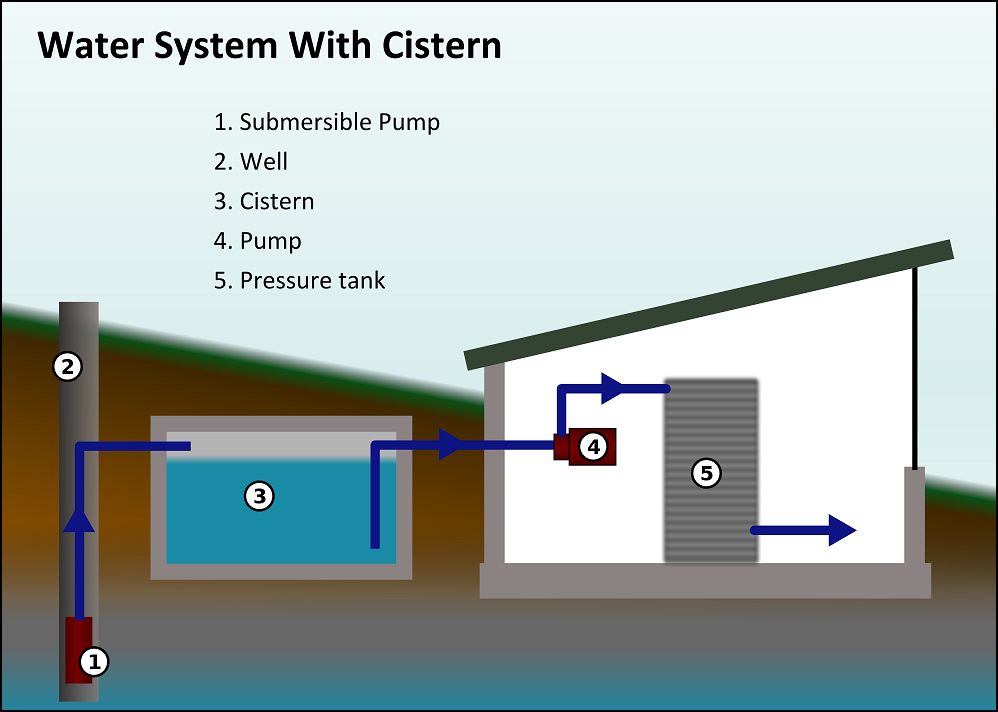
There are several different options for storing rainwater: above-ground storage tanks, below-ground cisterns, or downspouts directed to bioswales. Smaller systems (such as those that capture less than a hundred gallons) can use rain barrels for storage.
 Whatever option is chosen, a pump may be required to release the water when it’s ready to be used. Most pumps on residential systems are between one-third and one horsepower. That amount of power is sufficient to pressurize the water for either spray or drip irrigation. The pump can be activated manually, or a controller can be used to automate the rainwater flow into the irrigation system.
A couple of important considerations:
- Sanitation should be the first consideration. At the very least, a screen should be placed in the gutter over the downspout. This will keep out large particulate matter, large solids and leaves.
- Storage tanks must be properly sealed against pests and bacteria; otherwise, the water inside can become toxic.
- Every storage tank needs to have an overflow device to prevent backup in heavy-rain situations.
- The overflow device should be fitted with a flapper valve that will close up immediately after excess water has stopped flowing out. This will keep vermin from crawling up the spout.
An Attractive Option
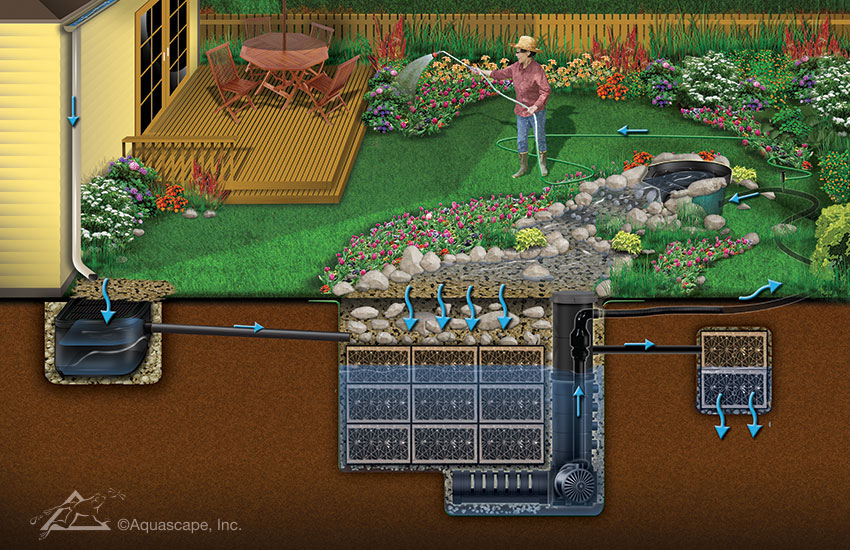
For property owners who find traditional storage units unattractive, more aesthetically-pleasing options are available. For instance, Aquascape, an Illinois-based company, offers its “RainXchange” system, which combines a recirculating, decorative water feature with an underground storage basin.

According to Irrigation & Green Industry magazine, RainXchange offers the same functionality of other storage systems. Specifically, “It makes use of modular storage basins, stackable blocks that are somewhere between milk crates and Legos, which can be arranged in different shapes to fit a variety of application settings. They sit inside a rubber membrane to form a single, water-tight unit underground.”
Contractors can install the RainXchange system under turf grass. An increasingly common option is to install the system beneath a patio made of permeable pavers. According to Ed Beaulieu, director of field research for Aquascape, “This way, the pavers act as a catchment area that prefilters the rainwater before it enters the blocks. It’s very, very efficient.”
The following video demonstrates the installation of a similar underground system by a Texas-based vendor, Innovative Water Solutions:
Closer to home, Rain Brothers, a rainwater-harvesting company based in Columbus, offers system design services throughout Ohio and much of the Midwest.
A simple residential project typically runs between $1,500 and $5,000, depending on a variety of factors, such as size and excavation costs. For instance, if a client’s property doesn’t allow room for heavy equipment, digging by hand will increase the labor time substantially.
Who Are the Target Customers?
According to most irrigation contractors, conservation is the primary motivator when property owners consider installing a rainwater catchment system. Despite the fact that the installation costs them money, these clients are more worried about the long-term consequences of water shortages, pollution and soil erosion.

They may have heard that capturing rainwater is a tried-and-true method of simultaneously controlling runoff and withstanding drought conditions.
“In a residential setting, it’s next to impossible to show an ROI in three to five years,” Lawrence says. “By and large, those clients are doing it for environmental concerns.”
Add It to Your Menu of Services
Rainwater harvesting is a viable permanent addition to the menu of services offered by landscape professionals. As homeowners rediscover this ancient practice of capturing rainwater, contractors will have increasing opportunities to offer their services for installation projects.
 Contractors can easily acquire the skills necessary to get started with catchment system installations. And there is an abundance of resources to ensure your success. The national Irrigation Association offers online classes on the subject, such as “Water Quality of Alternative Water Sources” and “Earning Points for Green Projects.”
In addition, the American Rainwater Catchment Systems Association (ARCSA) hosts workshops across the country for those seeking to pass their accredited professional exam. The ARCSA also offers a Resource Guide of rain harvesting designers, educators and suppliers.
Once you’re up to speed on best practices, rainwater harvesting can become a highly profitable source of revenue for your company… and a valuable service for your customers.
Sources:
Irrigation Association
Innovative Water Solutions
American Rainwater Catchment Systems Association

by Tom Barrett | Nov 1, 2016
November: Time for Winterizing
The dreary days of November remind us that it’s time to start thinking about winterizing your irrigation system.
Water expands when it freezes. Since automatic irrigation systems are usually buried only about twelve inches below the surface of the soil, water left in an irrigation system in freezing climates over the winter, even a mild winter, will certainly freeze — causing damage to pipes, fittings, valves, and sprinklers. Damage caused by a frozen irrigation system can be expensive and time consuming to repair next spring. Preventing winter damage by properly winterizing the irrigation system is important.

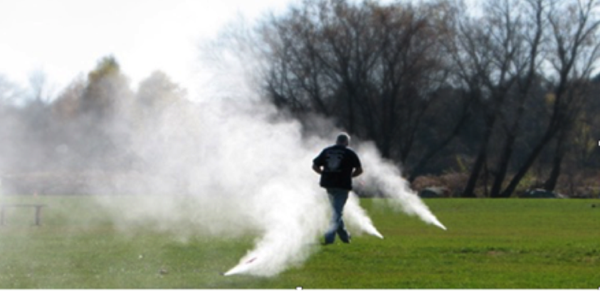
Using compressed air to force water out of the irrigation system is the most common method of winterization. However, irrigation systems equipped with automatic or manual drain valves do not require compressed air to winterize. Only the installing contractor will know if an irrigation system is equipped with automatic or manual drain valves.
Selecting an Air Compressor
Air compressors are available in various sizes. A properly sized air compressor is critical in order do effectively and efficiently blow air into the irrigation system, forcing any water out. The most common portable air compressor (representing about 80% of the portable air compressors in use today) is the 185 portable air compressor. This machine is rated at 185 cfm at 100 psi at full load.
This type of compressor can be found through a contractors’ equipment rental shop, and it’s more than adequate for most residential and commercial irrigation systems. Smaller 5 h.p. electric air compressors, even if they’re 100 psi, do not deliver enough volume of air to adequately winterize an irrigation system.
How-To: Compressed Air Winterization
When using a compressor for winterizing your system, follow these steps:
- Shut off the water to the system at the point of connection. The system shut-off valve may be either a ball valve or gate valve. It should be located in the basement or directly behind the water meter.
- Next, open a zone valve to relieve the system pressure.
- Attach the air hose from the air compressor to the blow-out point. The blow-out point is usually located directly behind the backflow device. The blow-out point may be a quick coupling valve, a hose bib, or a boiler drain.
A note of caution: The expanding air coming from the air compressor into the irrigation system will get hot and may melt the plastic pipe. Carefully check the temperature of the air hose connection at the blow-out point. Slow down or stop momentarily if it feels too hot! Cycling through each zone two or three times for short intervals will prevent too much heat buildup.
- Set the pressure regulator on the air compressor at 50 to 80 psi.
- On smaller residential systems, where the zones are typically about 10 gpm or less, open one electric remote control valve manually. Then cycle through all the other zones two to three minutes by manually opening each valve or by electrically operating each valve at the controller. Opening one valve manually will help to keep the air compressor from building up too much pressure, while assuring an adequate volume of air to thoroughly blow out all the water in the system. (On larger systems, it may not be necessary to open one valve manually.)
- Allow the air to flow through each zone until water and water vapor no longer appears from any sprinklers in the zone. Start with the zone with the highest elevation in the system or farthest from the point of connection. Blow out each zone successively toward the point of connection. It’s a good idea to cycle through each zone two times, to ensure no water is remaining.
How-To: Automatic Drain System Winterization
Some systems are equipped with automatic drains that open when the system pressure falls below 10 psi. For these systems, it is usually only necessary to turn off the water.
- Open a drain valve after the point of connection.
- Winterize the backflow device and controller (See “Backflow Preventer Winterization” below.)
Some irrigation systems incorporate automatic drain valves on the laterals with manual drain valves on the main line. The manual drain valves will be located in small valve boxes at the end and at low points on the main line. Open the drain valves, and allow the water to drain out completely. Then close the drain valve.
How-To: Manual Drain System Winterization
If your system is equipped with manual drain valves:
- Locate the drain valve for each zone and the main line. The manual drain is usually located in a small valve box at the end of the zone and at every low point. Also, the main line will have a manual drain at the end of the line and at every low point.
- Open each drain valve, allowing all the water to drain out, and then close the manual drains.
- Winterize the backflow device and controller (See “Backflow Preventer Winterization” below.)
How-To: Backflow Preventer Winterization
The backflow preventer is the plumbing device attached to the outside of your house. It is the source of water to the irrigation system, and it can can freeze and burst in only a few hours of below-freezing temperatures. So winterizing your backflow preventer is critical.
Here’s how:
- Turn off the main shut-off valve to the system.
- Using an adjustable wrench, remove the outlet drain plug or spigot on the outside piping.
- Turn valves to a 45-degree angle (half-open/half-closed position).
- Cover/wrap the backflow valve and all copper pipe with a large towel or blanket.
- Place 2-3 gallon bucket underneath drain and open the drain valve. Generally, 1-2 gallons of water will empty into the bucket. Once all the water has drained out of the pipe, close the drain valve.
How-To: Controller and Rain Sensor Winterization
To prepare the irrigation controller for winter, simply turn the controller to the off or “rain shutdown” position. (You can also disconnect the power and remove the battery, but this is not necessary.) Do not allow the controller to cycle through an irrigation schedule without water in the system.
If your irrigation system is equipped with a rain sensor or a soil moisture sensor, it’s not usually necessary to cover or remove the sensor when winterizing. Check with the manufacturer to make sure your rain sensor does not require any special instructions in preparation for winter.
How-To: Pump Winterization
If you have a submersible pump (i.e., located in a lake, stream or pond), the check valve at the pump must be removed to keep the discharge hose from freezing. The best way is to simply remove the pump and discharge hose from the water each winter, and reinstall in the spring.
If you have a centrifugal pump, follow these steps:
- Remove the drain valve (located at the base of the pump housing) and store it for the winter.
- Disconnect the power supply, to prevent the pump from being accidentally turned on without any water. (A pump running without water will quickly burn up.)
- If the pump is drawing water from a lake or stream, you must remove the intake hose or suction line completely from the water and store it for the winter.
- If a check valve is located on the discharge side of the pump, it too must be removed and stored for the winter.
Leave It to the Pros
As you can see, winterizing an irrigation system can be a complicated process. A knowledgeable professional is essential to minimize damage caused by freezing. An improperly winterized irrigation system can be an expensive proposition next spring.



 Chris Klein (CK): A Wi-Fi-based irrigation controller uses the homeowner’s Wi-Fi network to connect to the cloud. That’s where a lot of the process and scheduling takes place, and then that information is sent back down to the controller. You can have access to it through an app on any device you want—a desktop computer, mobile phone, tablet, etc.—and they all communicate with the same computers in the cloud.
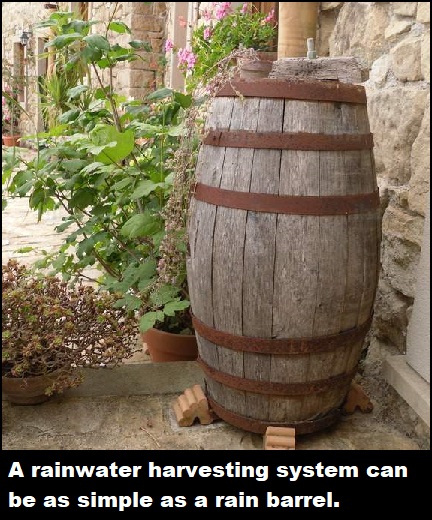 Whatever option is chosen, a pump may be required to release the water when it’s ready to be used. Most pumps on residential systems are between one-third and one horsepower. That amount of power is sufficient to pressurize the water for either spray or drip irrigation. The pump can be activated manually, or a controller can be used to automate the rainwater flow into the irrigation system.

 Contractors can easily acquire the skills necessary to get started with catchment system installations. And there is an abundance of resources to ensure your success. The national Irrigation Association offers online classes on the subject, such as “